
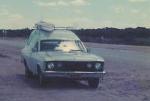
my 1960 xk ute
Page 2 of 2 •  1, 2
1, 2
![]()
Re: my 1960 xk ute
![]() Killer hq Mon 16 Apr 2012, 7:43 pm
Killer hq Mon 16 Apr 2012, 7:43 pm


Killer hq- Regular

- Posts : 69
Join date : 2012-03-11
Age : 37
Location : tumut, NSW
![]()
![]()
RAT BAG- MAJESTIC VANNER, Proud, Passionate, Paid Up 2015!
- Posts : 671
Join date : 2010-10-17
Age : 39
Location : Wagga Wagga, NSW
![]()
![]()
Re: my 1960 xk ute
![]() Imperfection Tue 17 Apr 2012, 9:23 am
Imperfection Tue 17 Apr 2012, 9:23 am
http://www.saintfrancisgarden.com/Life-Size-Blue-Heeler-29L-p289.html

Imperfection- MAJESTIC VANNER, Proud, Passionate, Paid Up 2017!
- Posts : 1981
Join date : 2010-06-29
Age : 64
Location : wallsend
![]()
![]()
Re: my 1960 xk ute
![]() RAT BAG Tue 17 Apr 2012, 9:39 am
RAT BAG Tue 17 Apr 2012, 9:39 am
RAT BAG- MAJESTIC VANNER, Proud, Passionate, Paid Up 2015!
- Posts : 671
Join date : 2010-10-17
Age : 39
Location : Wagga Wagga, NSW
![]()
![]()
Re: my 1960 xk ute
![]() Red-Pv Tue 17 Apr 2012, 11:50 am
Red-Pv Tue 17 Apr 2012, 11:50 am

Red-Pv- Majestic Vanner

- Posts : 268
Join date : 2011-03-14
Age : 33
Location : Regents Park
![]()
![]()
Re: my 1960 xk ute
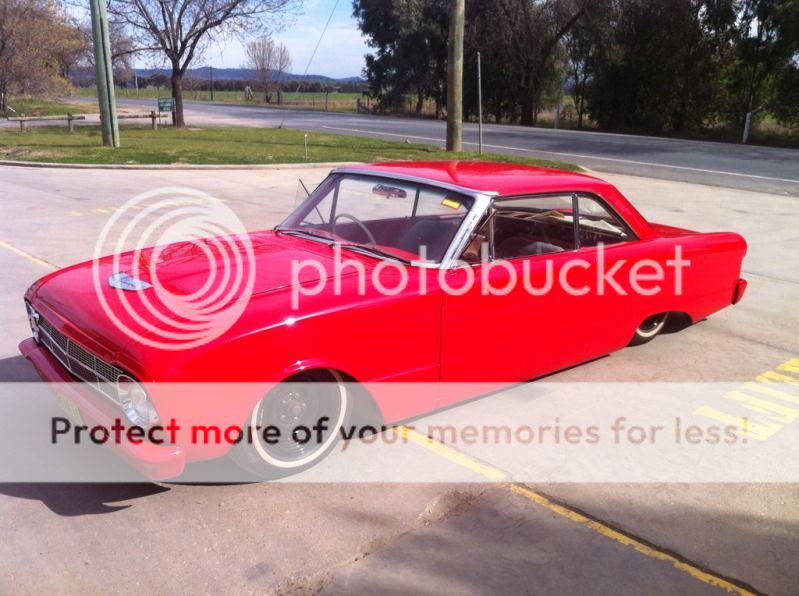
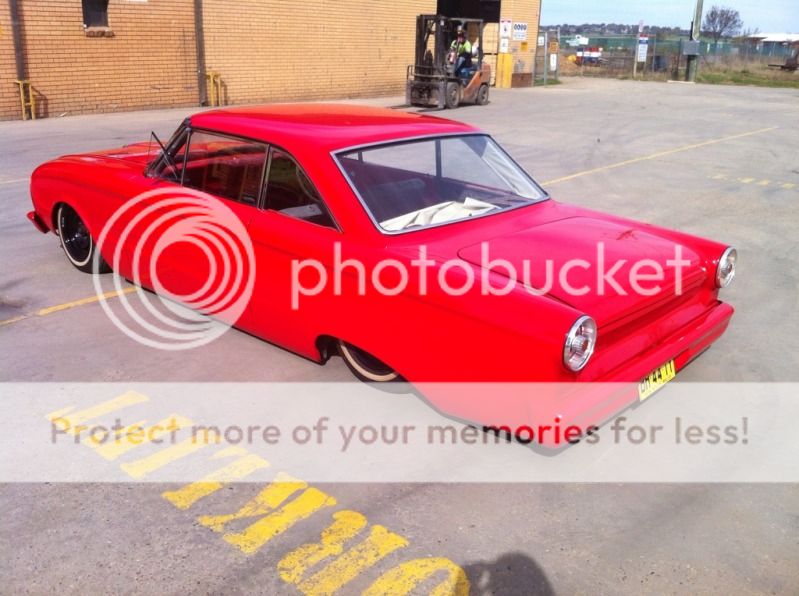
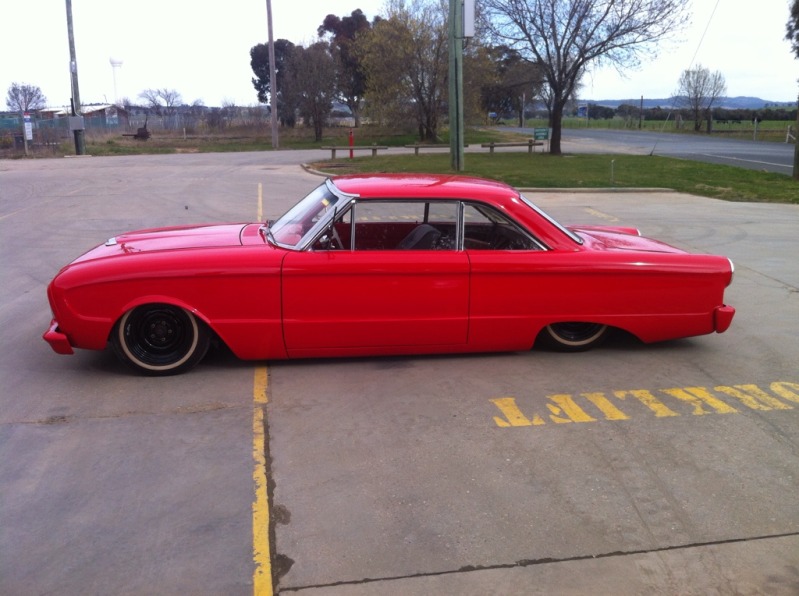
![]() RAT BAG Thu 12 Jul 2012, 8:42 am
RAT BAG Thu 12 Jul 2012, 8:42 am
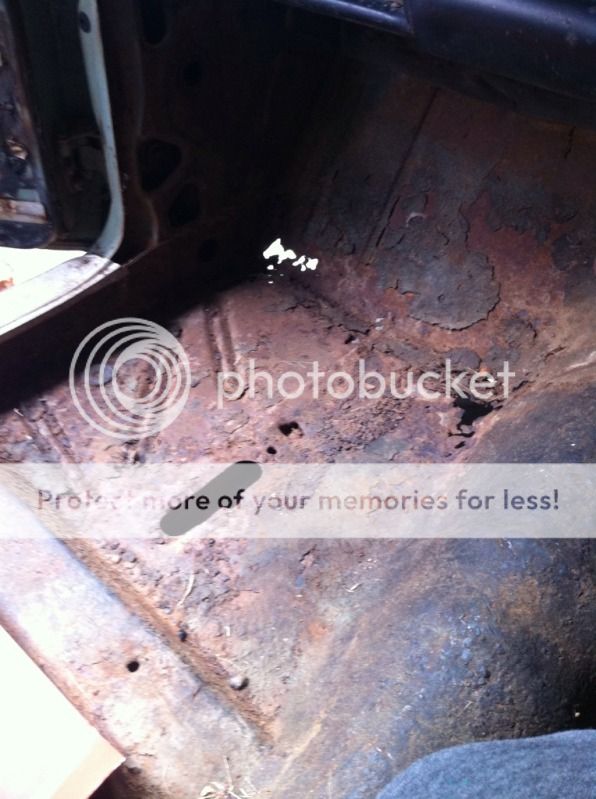
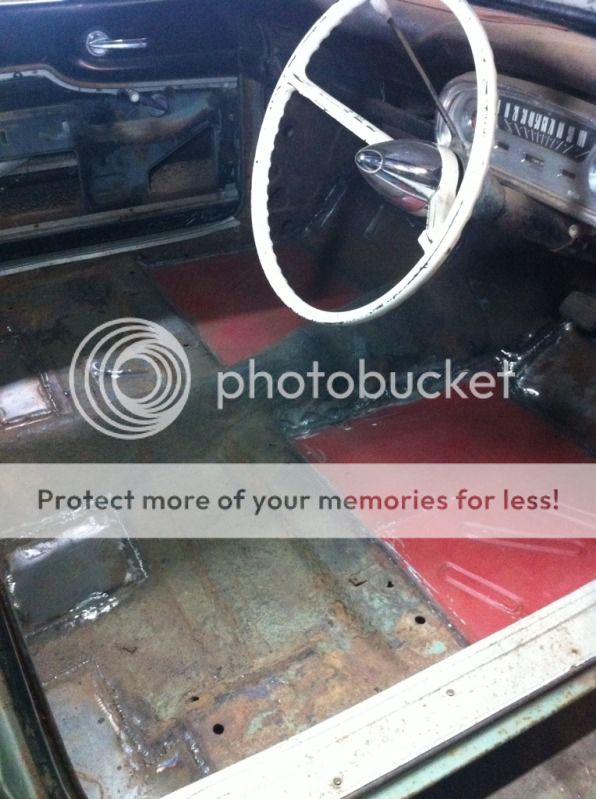
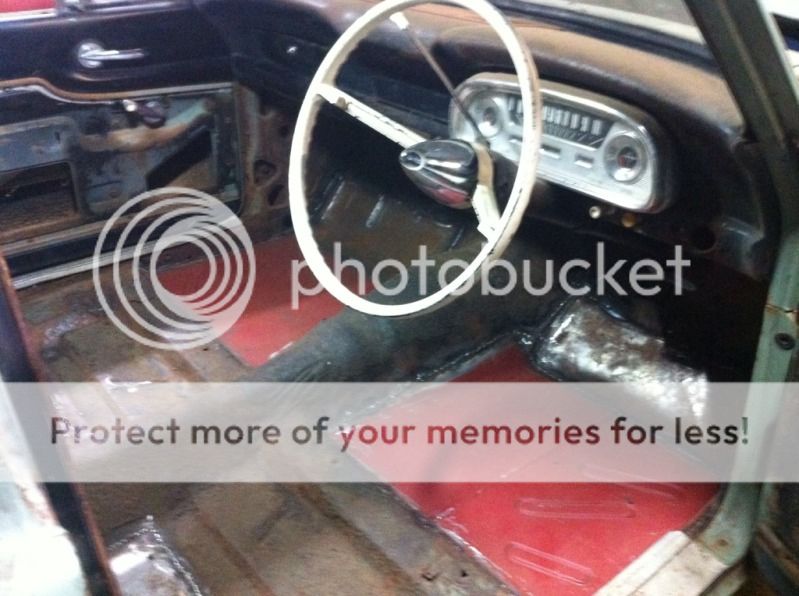
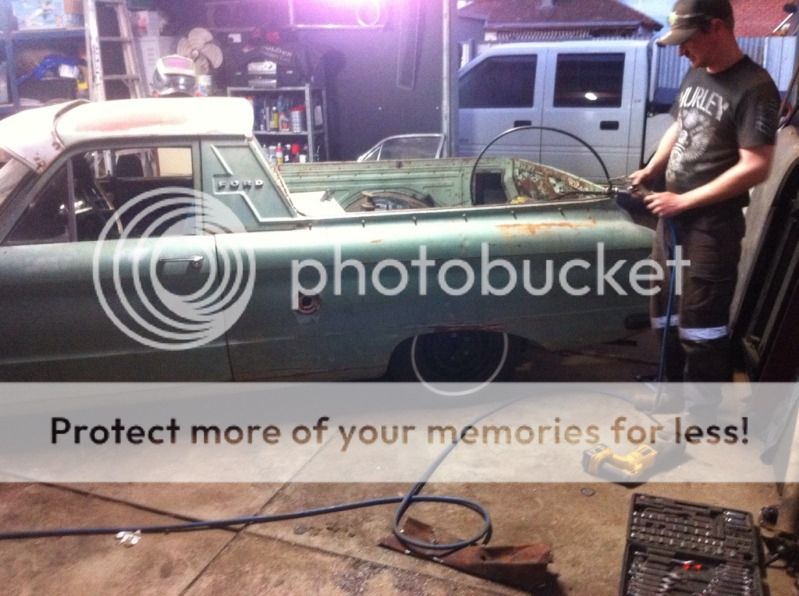
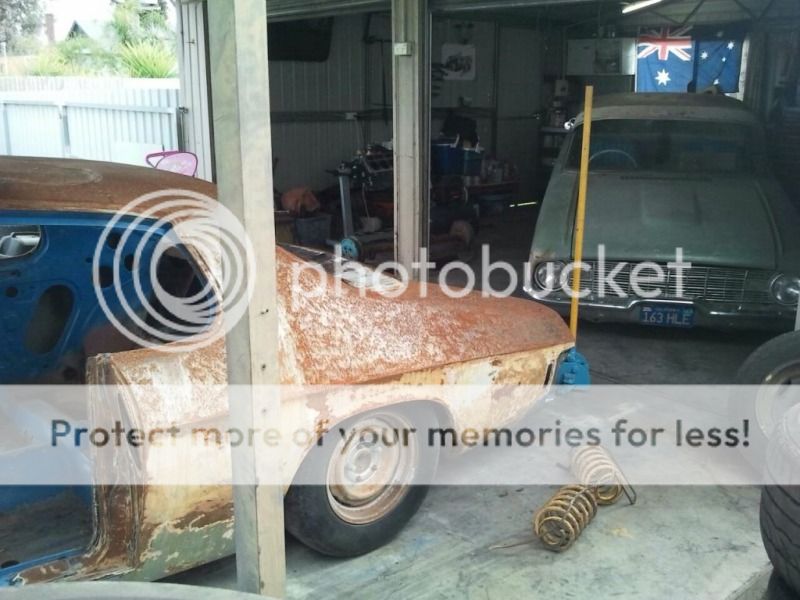
The ute needed all the floors replaced so I thought I might give welding a go myself. I have always wanted to be able to do more myself to cars so went and bought a welder and a bottle of gas, watched a few youtube movies and away I went. I am pretty damn happy with how it has all come out considering 3 weeks ago I had never used a welder.
First was the drivers floor
eek
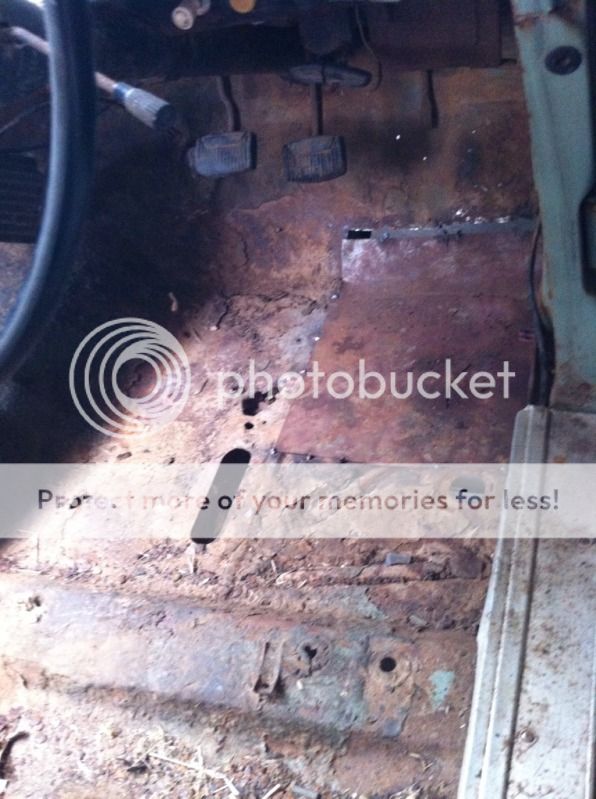
much better
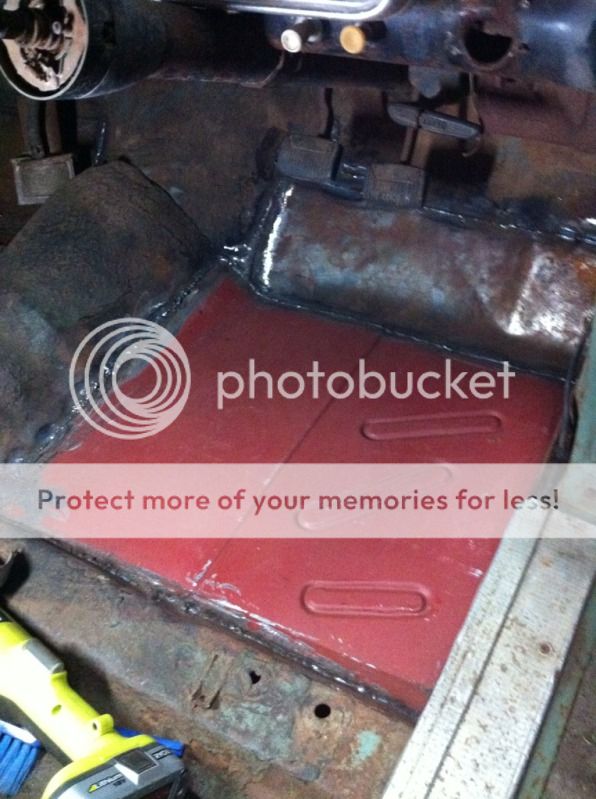
and then the passenger floor
eww
lovely
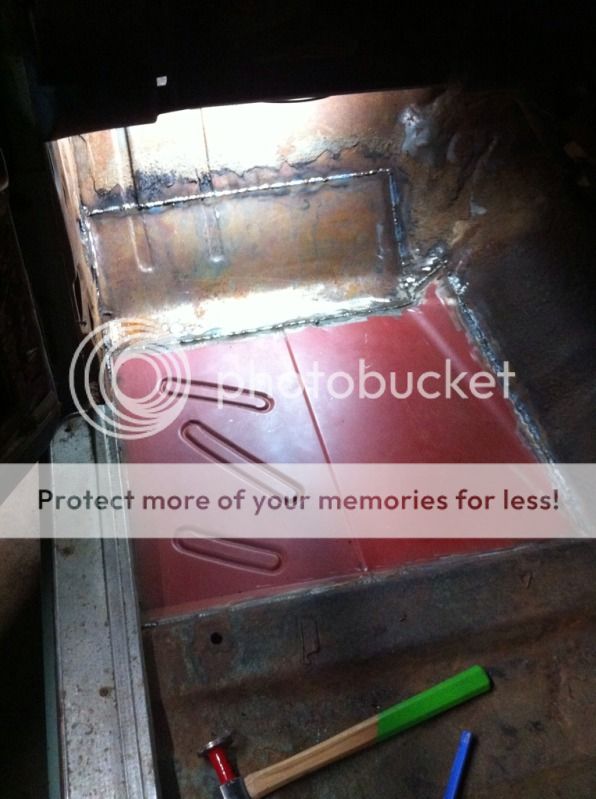
and finally got all the floors finished up last night and cleaned it right up
the rust repairing was good fun, cutting out the patches and everything I really enjoyed it and cant wait to get into the delivery haha. Thats my goal now. Do a beating/painting course at tafe and be good enough to do the whole delivery by myself.
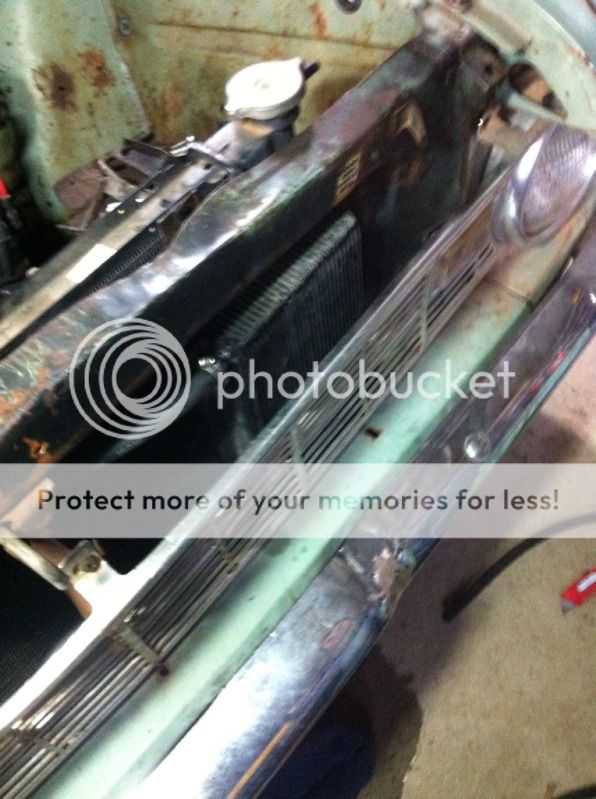
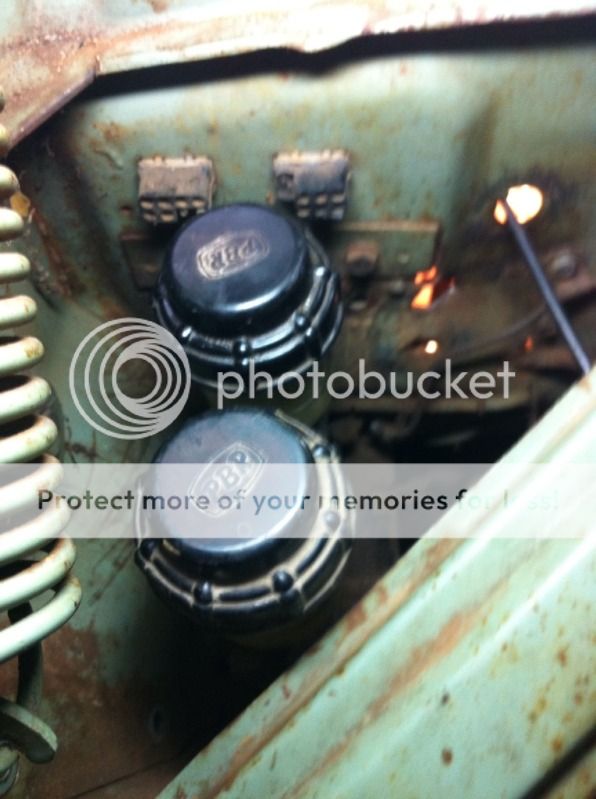
I also got my radiator fitted up over the weekend. Found a good use for holden parts

hopefully this weekend I can get the disc brake front all sorted out. will be sure to keep the updates coming if there is still interest.
Cheers
RAT BAG- MAJESTIC VANNER, Proud, Passionate, Paid Up 2015!
- Posts : 671
Join date : 2010-10-17
Age : 39
Location : Wagga Wagga, NSW
![]()
![]()
Re: my 1960 xk ute
![]() RAT BAG Thu 12 Jul 2012, 8:43 am
RAT BAG Thu 12 Jul 2012, 8:43 am
Red-Pv wrote:i have never seen this thread till today thats so awesome i have always wanted one of them, you should put the wagon roof on make it a delivery that would be awesome as
no need now mate
RAT BAG- MAJESTIC VANNER, Proud, Passionate, Paid Up 2015!
- Posts : 671
Join date : 2010-10-17
Age : 39
Location : Wagga Wagga, NSW
![]()
![]()
Re: my 1960 xk ute
![]() mr sinbin Thu 12 Jul 2012, 6:51 pm
mr sinbin Thu 12 Jul 2012, 6:51 pm
keep up the good work mate, look forward to seeing more progress pics

mr sinbin- Regular
- Posts : 58
Join date : 2011-06-28
Age : 33
Location : mid north coast
![]()
![]()
Re: my 1960 xk ute
![]() The Zodiac Thu 12 Jul 2012, 9:01 pm
The Zodiac Thu 12 Jul 2012, 9:01 pm
_________________
Dream as if you'll live forever, live like you'll die today.
Powered by Pals, Motivated by Mates.
Founding Four, MV Original.
2% Vanner
Rest in Peace Brother!
The Zodiac- Fallen Vanning Legend, Cruising in Heaven. RIP.
- Posts : 6193
Join date : 2009-12-02
Location : Snowy Mountains NSW.
![]()
![]()
RAT BAG- MAJESTIC VANNER, Proud, Passionate, Paid Up 2015!
- Posts : 671
Join date : 2010-10-17
Age : 39
Location : Wagga Wagga, NSW
![]()
![]()
Re: my 1960 xk ute
![]() Rusty62TransAm Fri 13 Jul 2012, 12:34 pm
Rusty62TransAm Fri 13 Jul 2012, 12:34 pm


I'm looking forward to watching the Ute's Progress.
_________________
Regards
Rusty!
______________________________________________________________________
Holdens, TransAm Fronts, Custom Mods, Tunnel Rams & 350 Chevs!
At EASTER 2012 and then on the Sept/October Long Weekend since 2013 we've held our Annual Van-Ins. All Welcome.
Relive the 80's & Embrace the New Millennium!
If you haven't been, You've been missing out on one of the Eastern States' Most Popular & Successful Annual Vanning Events!
Check the Events Page to find out what's happening this year!:
We have Chapters in Qld, NSW, Vic, SA and WA. Club Rego available in QLD, NSW, Vic & SA.

Rusty62TransAm- MAJESTIC VANNER, Proud, Passionate Life Member!
- Posts : 8507
Join date : 2009-12-02
Age : 61
Location : All the way from Hervey Bay to The Beautiful Hamilton Valley & back again! -

![]()
![]()
Re: my 1960 xk ute
![]() RAT BAG Fri 13 Jul 2012, 12:40 pm
RAT BAG Fri 13 Jul 2012, 12:40 pm
RAT BAG- MAJESTIC VANNER, Proud, Passionate, Paid Up 2015!
- Posts : 671
Join date : 2010-10-17
Age : 39
Location : Wagga Wagga, NSW
![]()
![]()
Re: my 1960 xk ute
![]() Rusty62TransAm Fri 13 Jul 2012, 12:45 pm
Rusty62TransAm Fri 13 Jul 2012, 12:45 pm
_________________
Regards
Rusty!
______________________________________________________________________
Holdens, TransAm Fronts, Custom Mods, Tunnel Rams & 350 Chevs!
At EASTER 2012 and then on the Sept/October Long Weekend since 2013 we've held our Annual Van-Ins. All Welcome.
Relive the 80's & Embrace the New Millennium!
If you haven't been, You've been missing out on one of the Eastern States' Most Popular & Successful Annual Vanning Events!
Check the Events Page to find out what's happening this year!:
We have Chapters in Qld, NSW, Vic, SA and WA. Club Rego available in QLD, NSW, Vic & SA.
Rusty62TransAm- MAJESTIC VANNER, Proud, Passionate Life Member!
- Posts : 8507
Join date : 2009-12-02
Age : 61
Location : All the way from Hervey Bay to The Beautiful Hamilton Valley & back again! -
![]()
![]()

Mad Van- Part of The Furniture

- Posts : 388
Join date : 2010-11-22
Age : 61
Location : Republic of Western Australia
![]()
![]()
Re: my 1960 xk ute
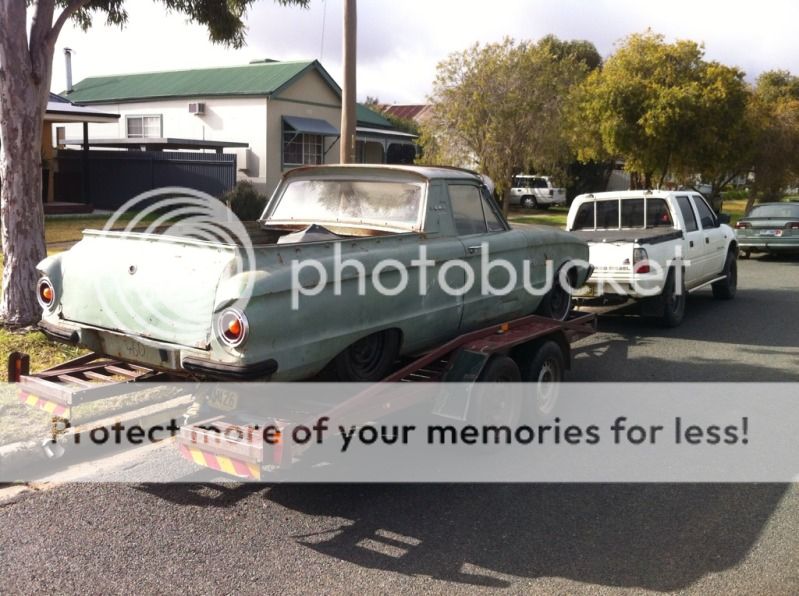
![]() RAT BAG Wed 25 Jul 2012, 1:27 pm
RAT BAG Wed 25 Jul 2012, 1:27 pm
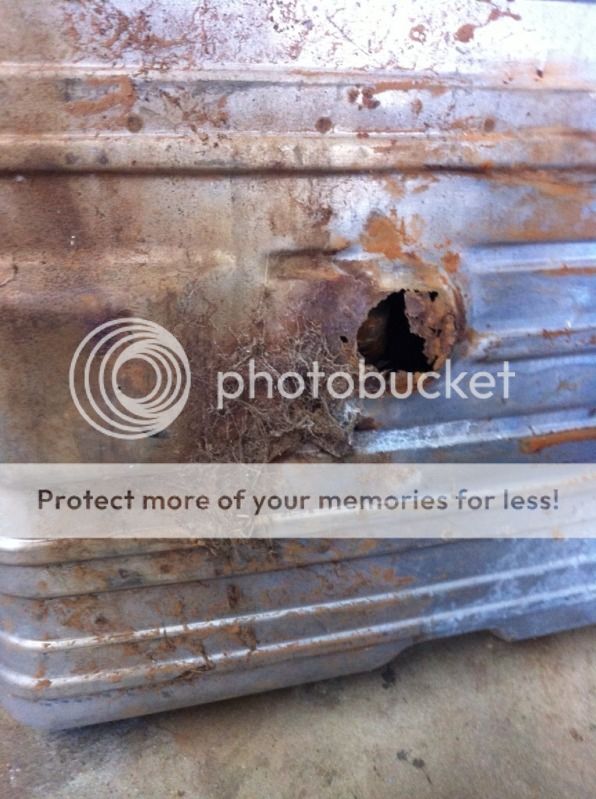
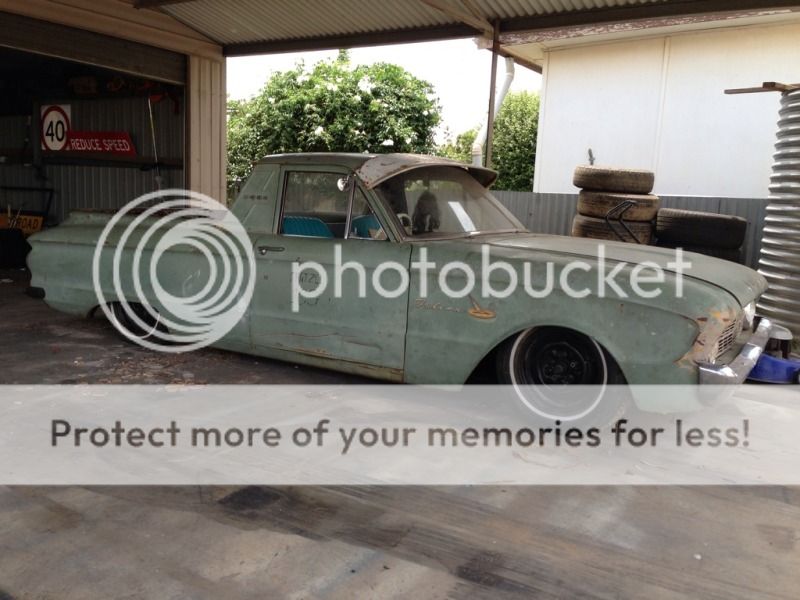
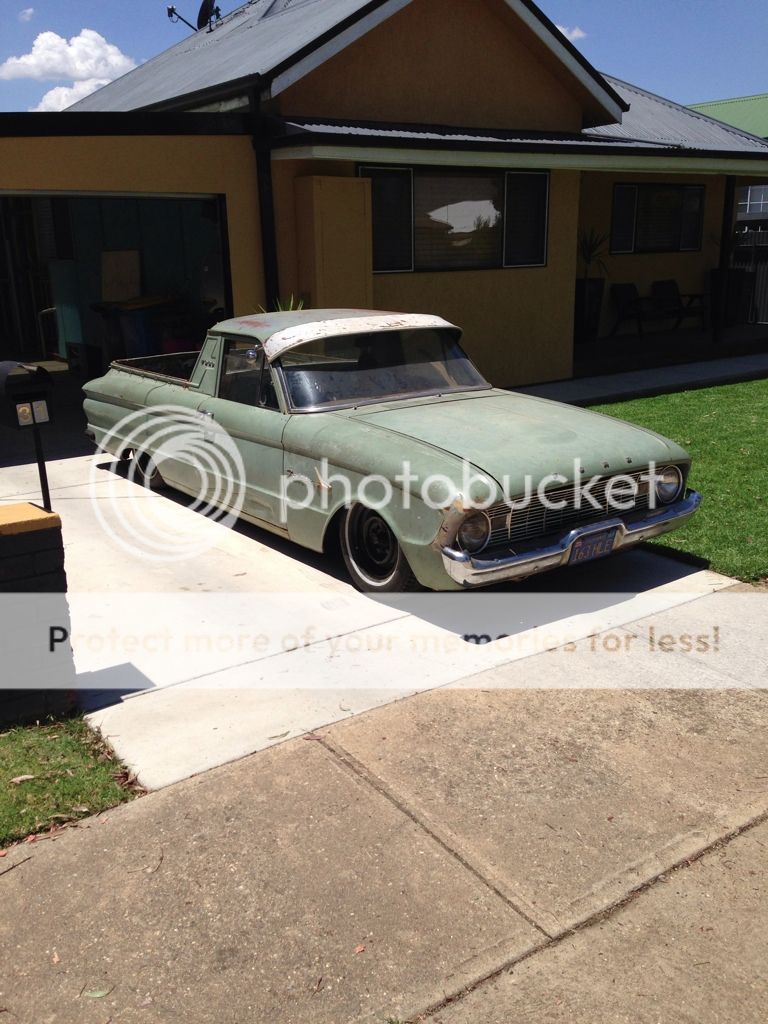
made a bit more progress with the old girl lately.
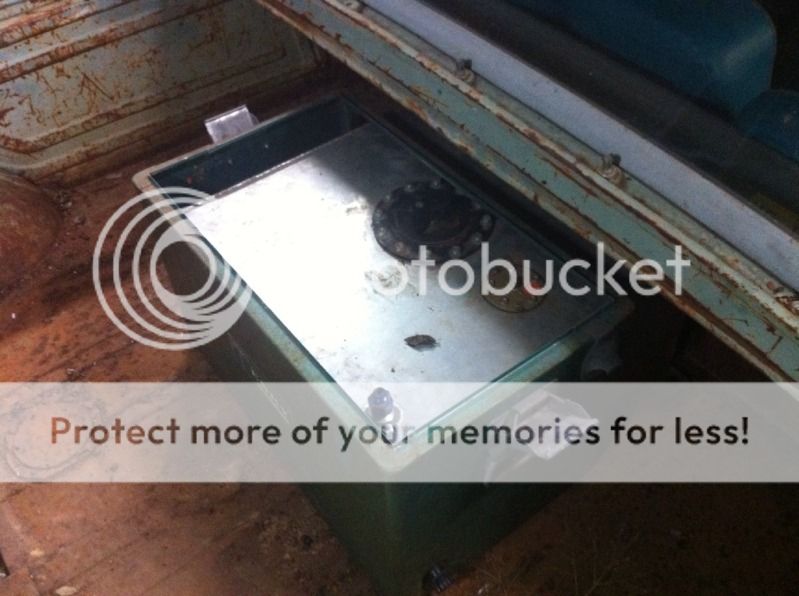
ripped the fuel tank out to assess what sort of condition it is in. I will let the picture explain haha
so with such a short deadline till Bright I decided to lend a mates fuel cell that he isnt using at the moment. So we mounted it in the back and it looked sh1thouse haha. Didnt suit the look of the ute at all. So a trip to the wagga swap found me another option. and walla
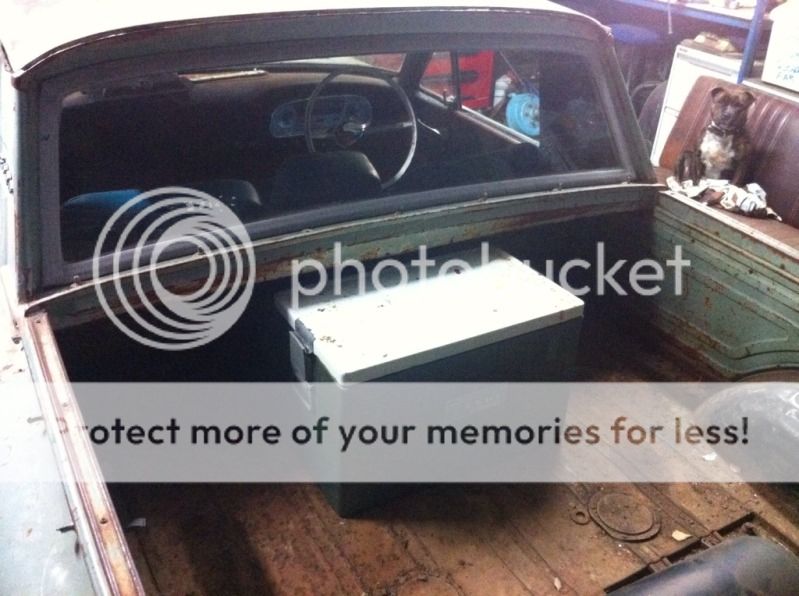
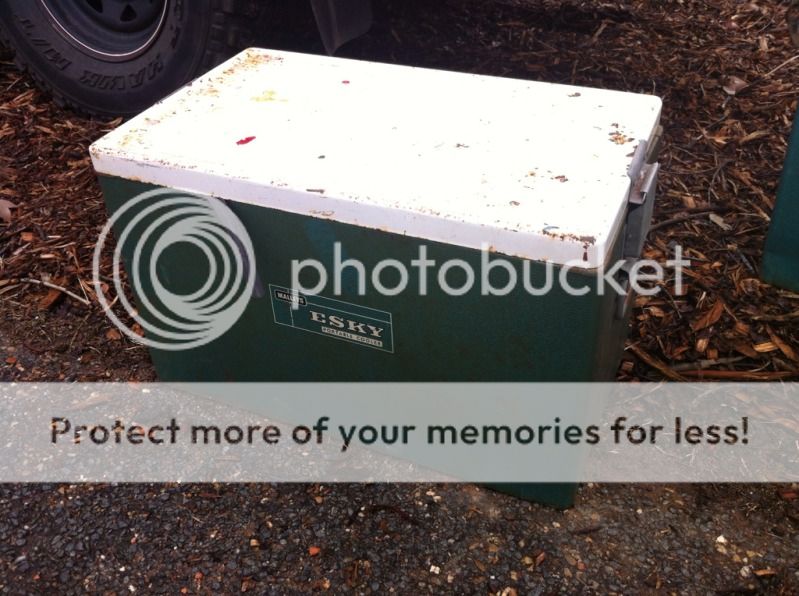
got myself an esky in the rear now instead haha
what started as this
evolved into a neat cover for it
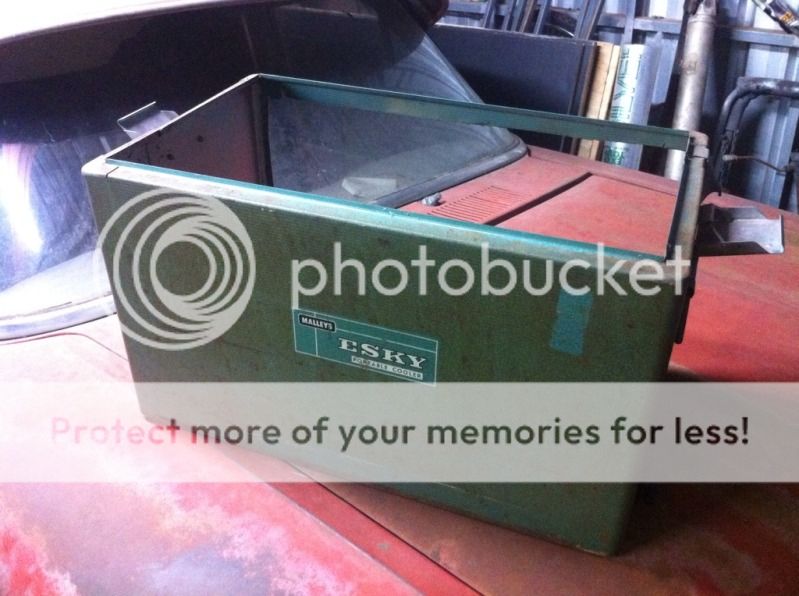
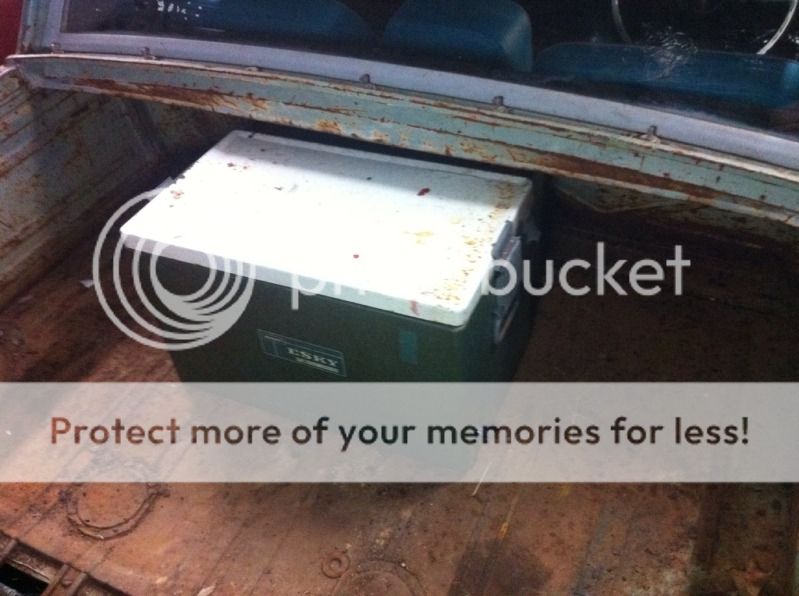
one thing out of the way now.
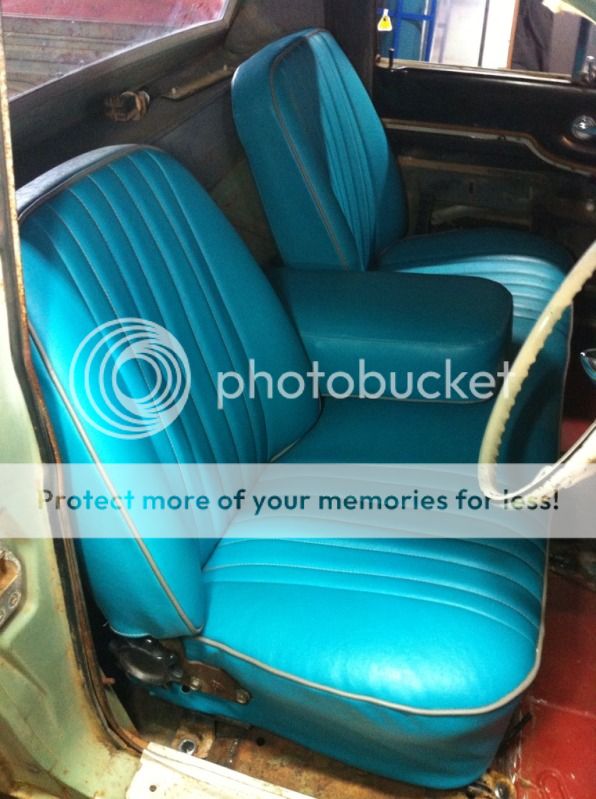
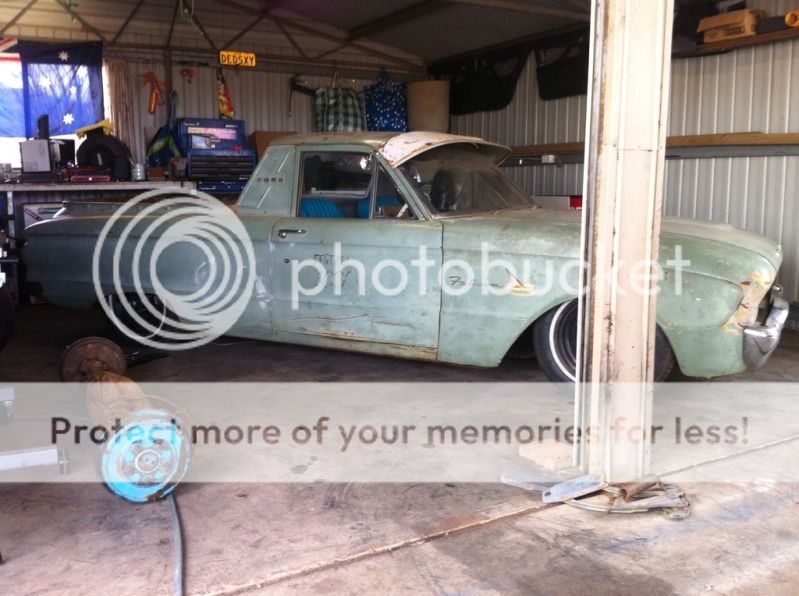
Next was to fit the seat up so I got some rails made up and mounted it. The floors will eventually be carpeted and everything but for now im going for a look that says "hey looks like he found this in a paddock, fixed the floors, trimmed the seat and regod it" haha so the seat went in without carpet or even painting the floors just yet
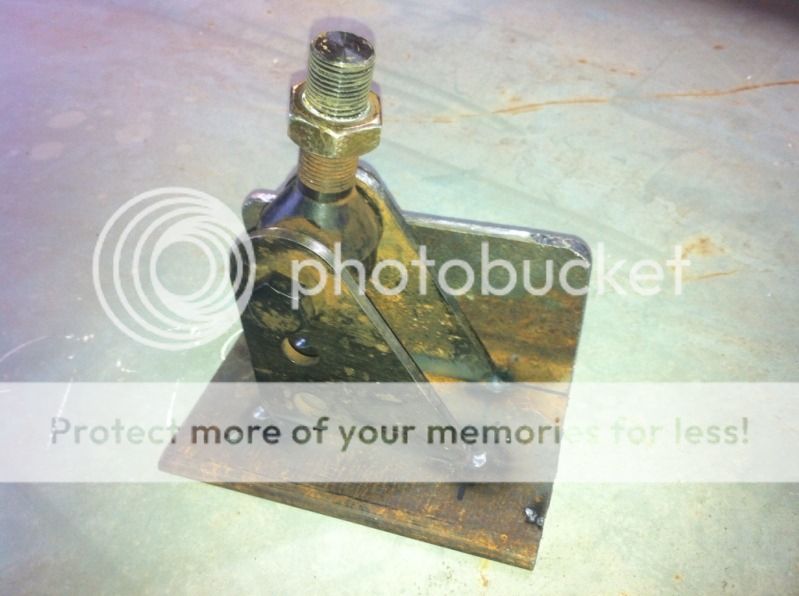
also got all my linkages sorted out
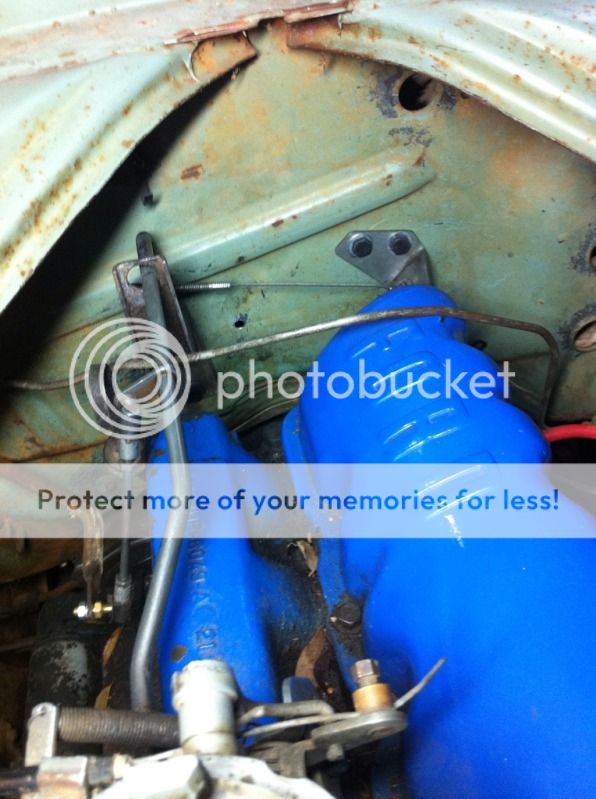
mounted a tranny cooler
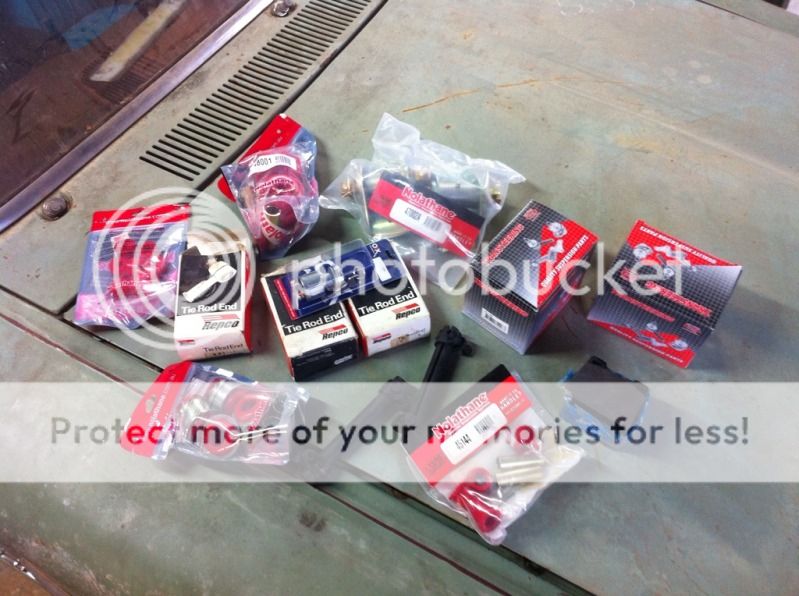
fitted the dual circuit xt master cylinder
and assembled my brand new brakes.
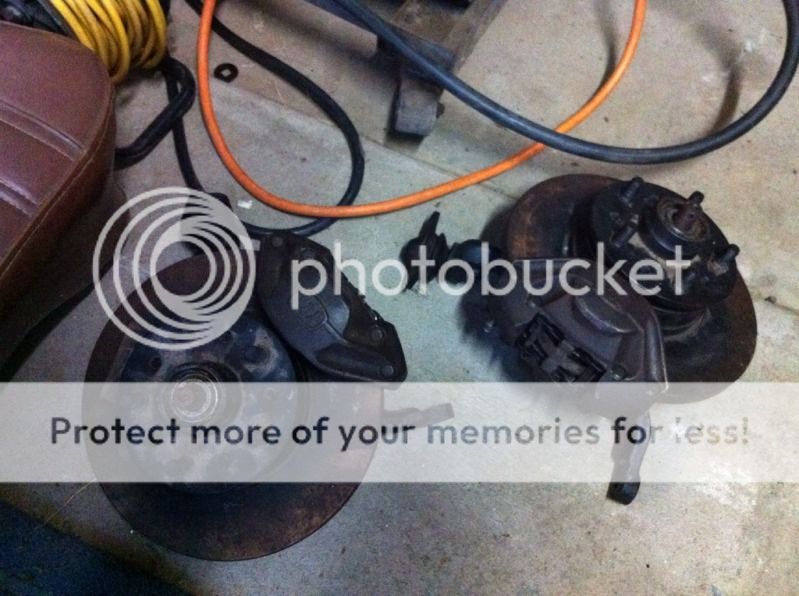
which leaves me with this weekends job of rebuilding the front end of the old girl
cant wait.
hopefully there will be more updates soon
RAT BAG- MAJESTIC VANNER, Proud, Passionate, Paid Up 2015!
- Posts : 671
Join date : 2010-10-17
Age : 39
Location : Wagga Wagga, NSW
![]()
![]()
Re: my 1960 xk ute
![]() sinbin Wed 25 Jul 2012, 4:00 pm
sinbin Wed 25 Jul 2012, 4:00 pm
Fully into the Esky trick.
Enjoying the pics and words, keep 'em coming.
Regards, Smooth
_________________


sinbin- Van God!!
- Posts : 1353
Join date : 2012-05-13
Location : In front of my 'puta!
![]()
![]()
Re: my 1960 xk ute
![]() Rusty62TransAm Wed 25 Jul 2012, 5:12 pm
Rusty62TransAm Wed 25 Jul 2012, 5:12 pm
I'm looking forward to checking it out at Bright this year.
_________________
Regards
Rusty!
______________________________________________________________________
Holdens, TransAm Fronts, Custom Mods, Tunnel Rams & 350 Chevs!
At EASTER 2012 and then on the Sept/October Long Weekend since 2013 we've held our Annual Van-Ins. All Welcome.
Relive the 80's & Embrace the New Millennium!
If you haven't been, You've been missing out on one of the Eastern States' Most Popular & Successful Annual Vanning Events!
Check the Events Page to find out what's happening this year!:
We have Chapters in Qld, NSW, Vic, SA and WA. Club Rego available in QLD, NSW, Vic & SA.
Rusty62TransAm- MAJESTIC VANNER, Proud, Passionate Life Member!
- Posts : 8507
Join date : 2009-12-02
Age : 61
Location : All the way from Hervey Bay to The Beautiful Hamilton Valley & back again! -
![]()
![]()
Re: my 1960 xk ute
![]() 77 HZ Ute Wed 25 Jul 2012, 7:26 pm
77 HZ Ute Wed 25 Jul 2012, 7:26 pm

77 HZ Ute- Newbie

- Posts : 14
Join date : 2011-11-15
Age : 32
Location : Southern Highlands
![]()
![]()
Re: my 1960 xk ute
![]() The Zodiac Wed 25 Jul 2012, 7:33 pm
The Zodiac Wed 25 Jul 2012, 7:33 pm
_________________
Dream as if you'll live forever, live like you'll die today.
Powered by Pals, Motivated by Mates.
Founding Four, MV Original.
2% Vanner
Rest in Peace Brother!
The Zodiac- Fallen Vanning Legend, Cruising in Heaven. RIP.
- Posts : 6193
Join date : 2009-12-02
Location : Snowy Mountains NSW.
![]()
![]()
Re: my 1960 xk ute
![]() RAT BAG Thu 30 Aug 2012, 9:26 am
RAT BAG Thu 30 Aug 2012, 9:26 am
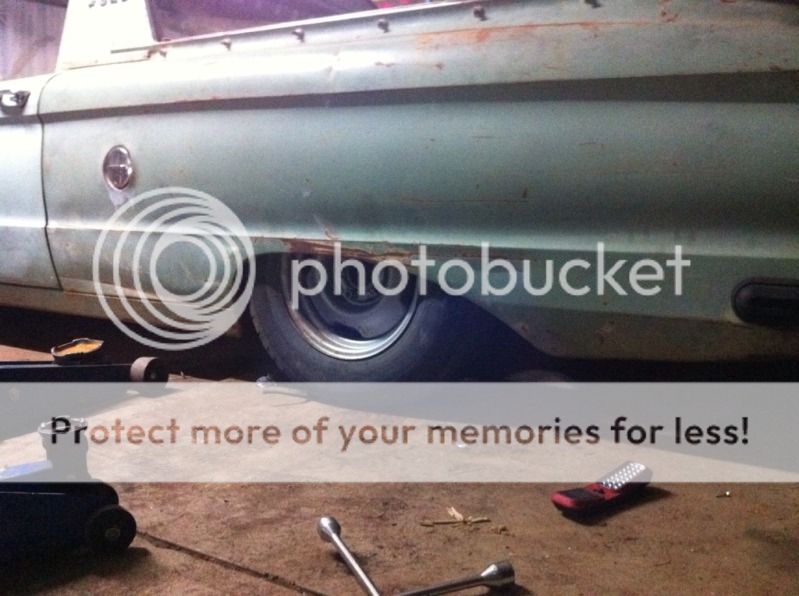
we started on the airbags a couple of weeks ago. First thing was to remove the old diff and put the hilux diff in that I had. I have always been a bit wary about using the hilux diff in it because I wanted it LOW and the diff is a bit wider then the stock one but it seemed to make sense because the hiace was originally bagged so all of the brackets were on that diff already. My mate has a hilux diff in his delivery and it works a treat but he has trouble with it scrubbing with a load in the back and I want mine as low as possible haha.
so as I said a couple of weeks ago a good mate of mine came over from west wyalong and we started on the rear setup. He is a welder by trade and knows his s
we removed the old diff and bolted the new one in on the leafs still so we could adjust everything. we then made these brackets up for the lower 4 link arms and welded them to the chassis and floor
I had to remove the old shock brackets and everything from underneath but it was all going great to start with.
With the lower brackets in, the diff hanging and the bridge across the top tacked in we decided to whack the wheels on it and see how it sat.
There was the first problem. the xy wheels that I had didnt fit. The diff needs a bigger centred rim to fit over the hubs.
I knew I had some at the parents farm off an xb so we did the nuts up tight and stood back to see the hard work
it was low but it was higher then before......by almost 2 inches
This is where I started to lose motivation haha. I knew it was only a case of moving the brackets from the top of the diff to the rear and moving the bridge around but with my mate coming 140ks to help it was making it hard.
Anyway I had a week away from the ute and went out to our farm to get some rims that I needed. a 14x6 with the bigger centre to fit. The following weekend my mate came back over and we decided to get stuck into it again. We moved the brackets to the rear of the diff and braced it all up. Because of this I then had to move the bridge across the top back which meant more cutting of the old girl haha. Lucky im no restorer cause this could make the vintage car community a bit sad.

bridge in and everything mounted in the spare wheel well just to trial it all up. Still needs alot of tidying up but it was in there. The spare wheel well is pretty rusted out so im a bit worried about it to be honest haha
We then lowered it off and hey-presto we had some slammage haha.
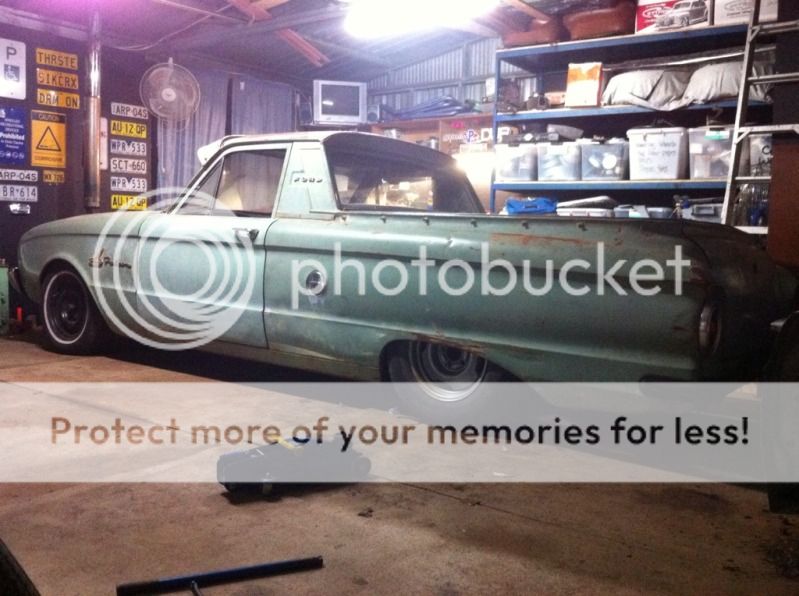
but with that came more problems. Even the smaller wheels that fit better on the diff press hard on the outer gaurd. By that I mean we had to let the air out of the tyres to let the gaurd drop down over it then pump it back up HMMMMM. So it looked good but motivation was at an all time low by now. 2 full days of work and although it looked cool the only way I could get it moving was to have it full raised

By this stage I was over it. I was at a stage where I should have just left it lowered normally like every other normal person would haha. Then I had a mate visit me in his newly finished (well the exterior anyway haha) xm coupe and I tell you what it helped with motivation haha
so after a few calls between my mate and I we decided to tow the car over to his place and get it finished. We are putting the old diff back into it and putting all the brackets and everything off the hilux diff onto it. By having it there he can tinker away when he wants and ill be there on weekends. makes sense me paying the petty considering it being my car haha.
So we loaded it up last sunday and headed off (yes I drive a holden as a daily haha)
we booted the monaro that we rescued a few months ago out of the shed to let the real car have a warm bed haha
and here she sits waiting for more work
hopefully have some more good updates in a few weeks. we are thinking about modifying the floor in the back now that we have started cutting it up because it was very rusty in there anyway but will see how we go.
RAT BAG- MAJESTIC VANNER, Proud, Passionate, Paid Up 2015!
- Posts : 671
Join date : 2010-10-17
Age : 39
Location : Wagga Wagga, NSW
![]()
![]()
Re: my 1960 xk ute
![]() KustomCandy Tue 20 Nov 2012, 6:30 pm
KustomCandy Tue 20 Nov 2012, 6:30 pm
Freakin loooving it! YOU sir, have the idea of "how" these things are built (Bar that pretty benchy hehe).
Hmm, I just may have been given an idea.
.............I almost forgot what forum I was on their for a moment lol.
EDIT: Did I mention Pinstriping?
Dan
Last edited by KustomCandy on Tue 20 Nov 2012, 6:33 pm; edited 1 time in total (Reason for editing : It needs...........PINSTRIPING!)

KustomCandy- Resident

- Posts : 134
Join date : 2011-03-19
Location : Mornington Peninsula
![]()
![]()
Re: my 1960 xk ute
![]() RAT BAG Tue 20 Nov 2012, 9:34 pm
RAT BAG Tue 20 Nov 2012, 9:34 pm
As for pinstriping that is definitely on the cards mate.
RAT BAG- MAJESTIC VANNER, Proud, Passionate, Paid Up 2015!
- Posts : 671
Join date : 2010-10-17
Age : 39
Location : Wagga Wagga, NSW
![]()
![]()
Re: my 1960 xk ute
![]() KustomCandy Wed 21 Nov 2012, 6:27 am
KustomCandy Wed 21 Nov 2012, 6:27 am
And Lace painting, Man. You have my attention now.
I'll be interested in seeing the Lines you get on. I'm a practicing Stripper myself. Always good to see some well executed Pinz
Dan
KustomCandy- Resident
- Posts : 134
Join date : 2011-03-19
Location : Mornington Peninsula
![]()
![]()
Re: my 1960 xk ute
![]() RAT BAG Sun 23 Dec 2012, 11:49 am
RAT BAG Sun 23 Dec 2012, 11:49 am
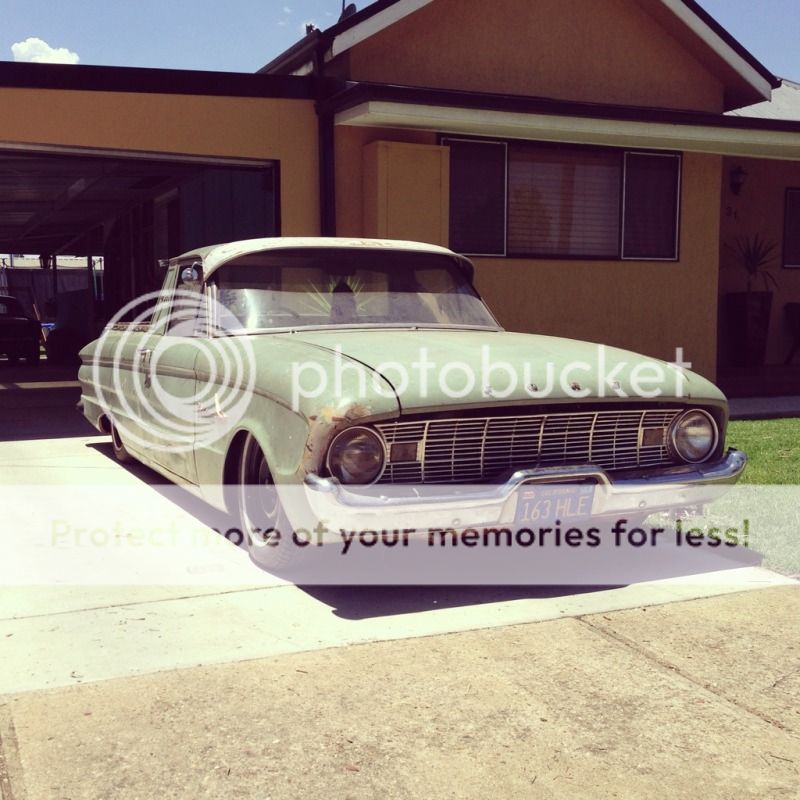
Still needs the rear tubs removed to get it sitting lower but its looking cooler already
RAT BAG- MAJESTIC VANNER, Proud, Passionate, Paid Up 2015!
- Posts : 671
Join date : 2010-10-17
Age : 39
Location : Wagga Wagga, NSW
![]()
![]()
Re: my 1960 xk ute
![]() fc59 Sat 29 Dec 2012, 10:05 pm
fc59 Sat 29 Dec 2012, 10:05 pm


fc59- MAJESTIC VANNER, Proud, Passionate, Paid Up 2016!
- Posts : 1473
Join date : 2011-05-04
![]()
![]()
Page 2 of 2 • 1, 2
![]()
|
|
|